Browshot blog

This blog provides updates on the API and features offered by Browshot. Subscribe to our blog to stay up to date on the service.

Take thousands of screenshots in a couple of clicks

Sep 6, 2020

Take thousands of screenshots With Browshot, you can take thousands of screenshots at once without writing a line of code. Using the batch feature, you can upload a list of URLs (from a text file, an Excel spreadsheet, etc.) and downloads all the screenshots in a ZIP archive. In this post, we'll explain:

  • How to prepare the batch
  • How to follow the progress
  • How to specify the image file you want
  • How to download all screenshots at once
  • Examples of batch to download
  • The Batch API for advanced users

There is no limit to the number of screenshots you can request. One of our users took nearly a million screenshots in a single batch. The batch takes care of trying screenshots multiple times if the requested URL is temporarily unavailable.

Prepare the batch: screenshot name, S3 upload, etc.

All you need is the list of URLs for which you want screenshots. You can start with a text file, with open URL per line. In this case, Browshot will generate "random" names for each screenshot.

You can also specify the file names for each screenshot in your text file. Add the image file separated by a comma:

https://browshot.com/,site/browshot.com.png
https://thumbalizr.com/,site/thumbalizr.com.png
https://blitapp.com/,site/blitapp.com.png

If you use spreadsheet software like Excel, with the first column for the URL and the second column for the file name, you can export the spreadsheet as a CSV file and use it for your batch.

You can use folders in the file name. If you choose the S3 upload when you create your batch, these file names will be used in your S3 bucket.

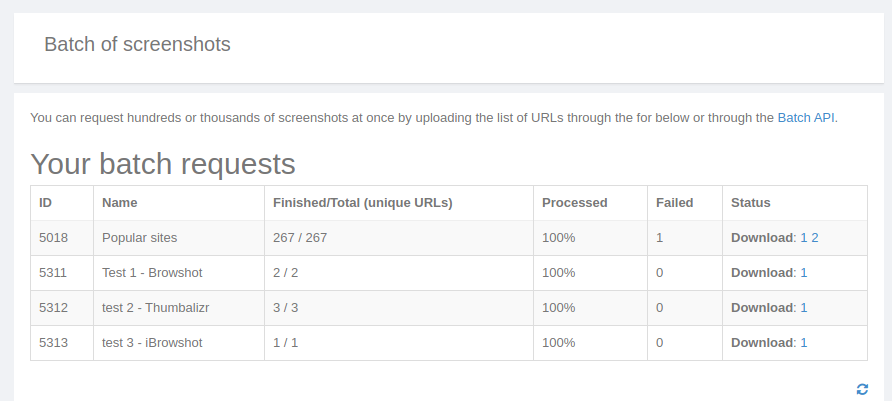
Now that you have your text file (or CSV file) with the list of URLs, and maybe file names as well, you are ready to create a batch. In the Browshot dashboard, go to Batch from the left menu. At the top of the page, you'll find your previous batches and a link to download the results:

Download your screenshots

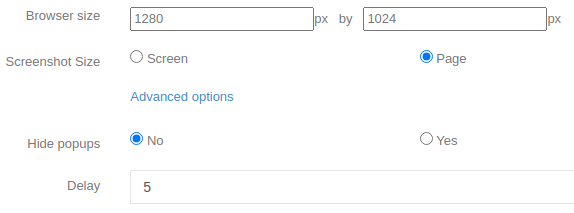
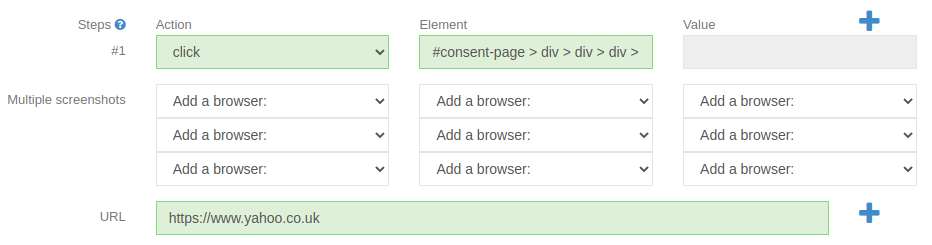
Then, you'll find the form to create a new batch. You can set a name for your batch to make it easier to find later. Just like for regular screenshots, you can change many parameters, such as what browser to use, the country of origin, the size of the browser, etc. Click on Advanced options to customize the HTTP request (cookie, referrer, etc.) or inject a script. Finally, choose the image format (PNG or JPEG) and the size of the screenshot or thumbnail. If you want your screenshots to be uploaded to AWS S3 as they are done, add your S3 bucket name. Upload your text or CSV file and hit Request.

Create a new batch

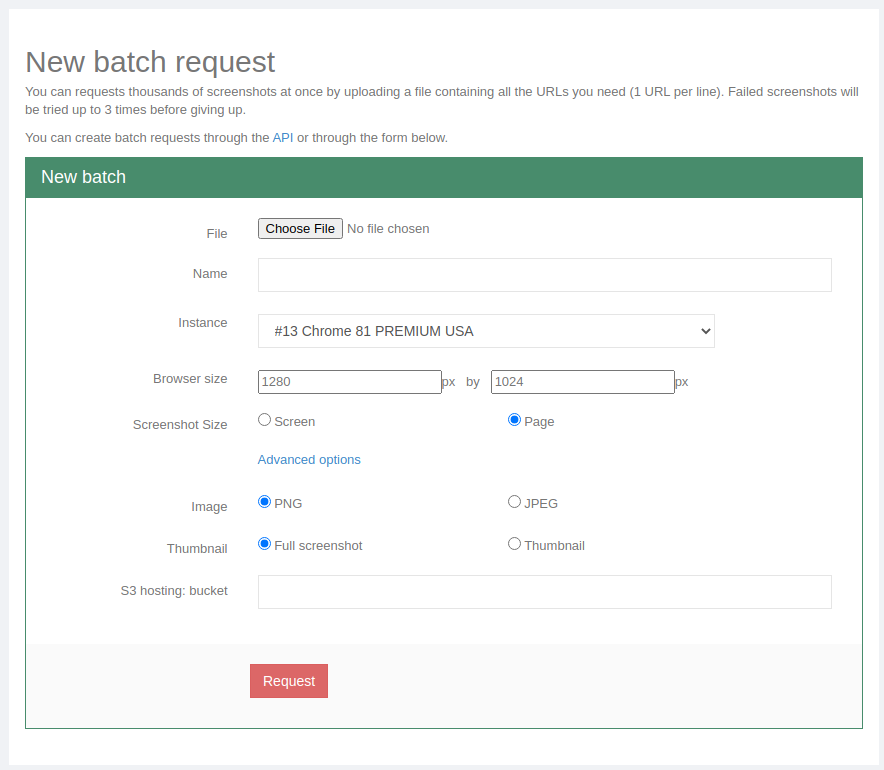
I want to highlight the choice of image format (PNG or JPEG). PNG offers the best image quality, while JPEG has a much smaller file size. A JPEG file can be 10x smaller than the same PNG with just slightly lower quality. Having smaller files might be important if you're taking many screenshots.

Note: We recommend creating a test batch with just one or two URLs to verify all your settings.

Follow the progress

Once you hit Request, Browshot will process the batch-create. Your batch will be added to the list of batch requests at the top of the page. The table will show how many unique URLs have been found in your file (Finished/Total), how many screenshots have been completed ( Processed), how many have failed (Failed), and a rough estimate of how long it should take (Status). Press the refresh button at the bottom right of the table to get updated information.

Note that the batch will take longer if some URLs are not reachable or take a long time to load. Each failed screenshot will be retried up to three times.

When the batch is done, the last row will show a link to one or more files to download.

Download the screenshots

If you take a lot of full-page screenshots, the resulting ZIP file might be very big, several GB. To make it easier to download and unzip on your computer, we split large files into smaller files of 100MB. You must download all the files on your computer before you can decompress them. Then, follow the instruction on the Batch screen: Open the first file with 7-Zip (Windows) or Keka (Mac OS X).

When you decompress the files, you'll find a CSV file, along with all the image files, that contains all the details of your screenshots:

  • URL
  • Status: finished or error
  • ID: the screenshot ID
  • filename: the local file name for the screenshot
  • status code: the HTTP status code of the URL (200, 404, etc.)

The CSV file can be opened with any spreadsheet software like Excel, Google Sheet, etc.

Examples of batches

Here are a couple of batches you can download to better understand what to expect:

  1. Batch with no image files: text file - ZIP archive
  2. Batch with an image file requested: text file - ZIP archive
  3. Batch from a text file with more than two columns: text file - ZIP archive

The Batch API

Batches can also be created, checked and downloaded using the API. If you want to take 10 or fewer screenshots at once through the API, consider using screenshot/multiple instead of a batch.

Don't hesitate to contact us if you need help creating batches.
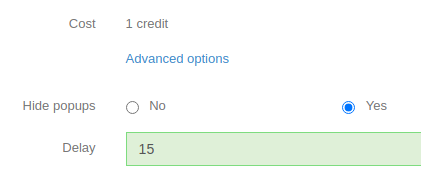
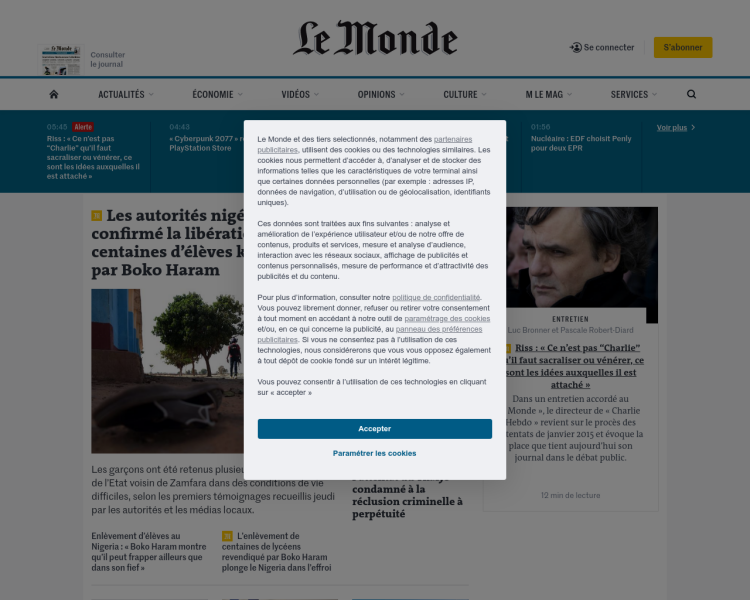
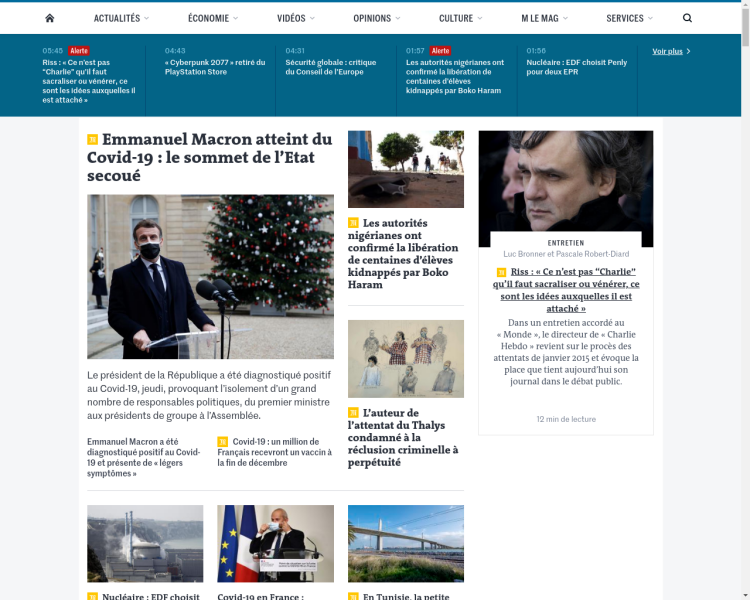
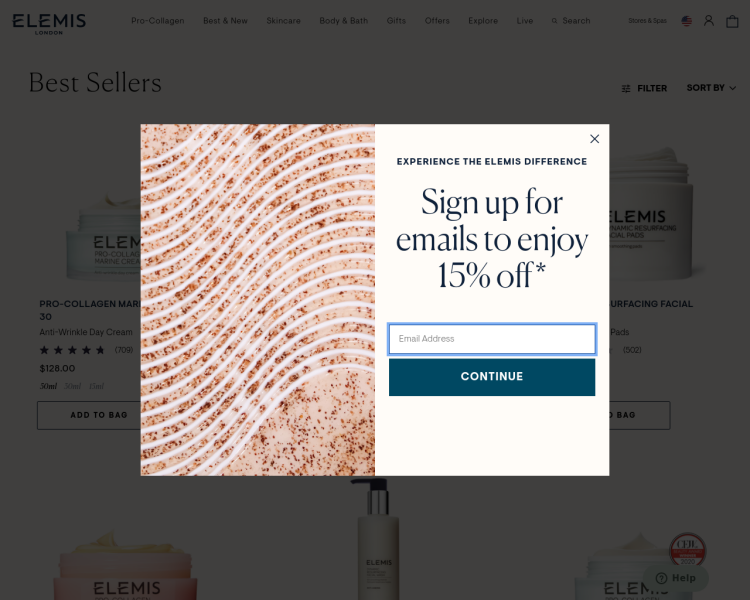
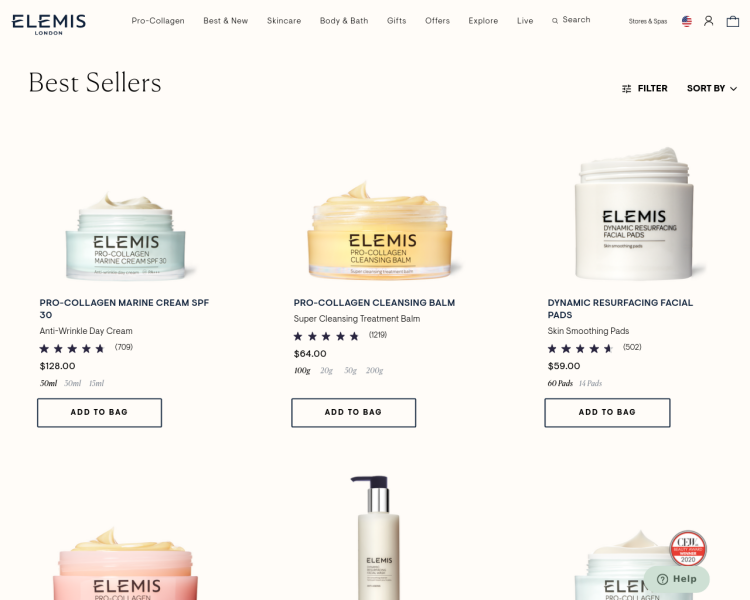
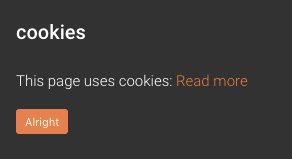
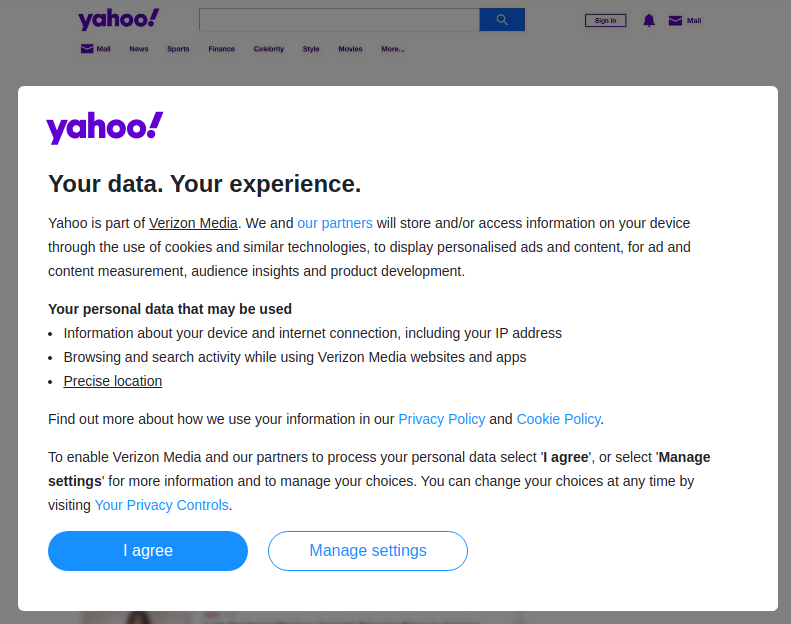
See more...

Hide a cookie notice or other banners

Aug 17, 2020

Tags: api automation

Hide a cookie notice or any banner from your screenshots Update: we have added an API parameter to hide most ads and popups automatically. See this blog post for more information.

Many websites prompt the user to accept a cookie or some other terms of service, or show an ad that covers most of the page. You can easily remove these banners and popups from your screenshot by leveraging the automation steps. We'll review a couple of examples in this blog post.

Yahoo UK privacy banner

If you visit https://www.yahoo.co.uk/, you'll be presented with this banner about their new privacy policy:

Hide the Yahoo privacy popup

If you want to take a screenshot of the home page, you must to click on "I agree". You can add an automation step to click the button. All you need is the CSS selector that corresponds to this button. Follow these steps to get it:

  1. In Chrome, right click on the "I agree" button and choose Inspect. Other browsers, such as Firefox, have a similar option.
    Inspect the blue button
  2. This opens the Chrome Developer Tools. The corresponding HTML code is highlighted in light gray. Right-click on it. Choose Copy, and then Copy selector
    Get the CSS selector
  3. The CSS selector has been copied to your clipboard. Paste it anywhere to find out what it is:
    #consent-page > div > div > div > div.wizard-body > div.actions.couple > form > button
CSS selector

You can now use the CSS selector with the automation step, either through the API or through the dashboard. To test it through the dashboard, click on Advanced Web Options. Add this step:

Action: click
Element: #consent-page > div > div > div > div.wizard-body > div.actions.couple > form > button

Hide the Yahoo privacy popup

USA Today cookie banner

USA Today (https://www.usatoday.com/) displays a banner to accept cookies at the bottom of the page. Like in the previous example, you can click on "Accept Cookies" to hide it.

Hide the USA Today cookie notification

To get the CSS selector of the "Accept Cookies" button, do this:

  1. Right click on the "Accept Cookies" button and choose Inspect
  2. This opens the Chrome Developer Tools. The corresponding HTML code is highlighted in light gray. Right-click on it. Choose Copy, and then Copy selector
  3. The CSS selector has been copied to your clipboard. Paste it anywhere to find out what it is:
    #onetrust-accept-btn-handler
CSS selector

You can now use the CSS selector with the automation step, either through the API or through the dashboard. To test it through the dashboard, click on Advanced Web Options. Add this step:

Action: click
Element: #onetrust-accept-btn-handler

You can test the automation steps with your free account. Contact us if you need help getting the CSS selector for any website.

See more...

Take screenshots of a carousel

Apr 8, 2020

Tags: api automation

Take screenshots of all the positions of a carousel The new automation steps make it easy to take several screenshots of the same page in different states. This is particularly useful if you want to capture all the positions of a carousel or slider. In this post, we will show you how to take screenshots of all carousel elements shown at https://walmart.com/. At the top of the page, the carousel rotates five different products:

Carousel at Walmart.com

The carousel has five dots that allow the user to manually display an element. With the automation steps, we can click on each dot to move the carousel, and then take a screenshot of the new position. We must get the CSS selector that corresponds to each dot. To do this, press F12 in your browser to open the Developer Tools. In the top left corner of the Developer Tools, click on the mouse cursor highlighted in red below.

Developer Tools

Then, click on the first dot in the carousel to select it. This highlights the corresponding HTML code in the Developer Tools. Right-click on the highlighted code and choose Copy > Copy selector:

Developer Tools CSS selector

This copied the CSS selector of the first dot. If you paste it in a test editor, you get this value:

body > div.js-content > div > div > div.js-body-content.page-content-wrapper > div > div > section:nth-child(1) > div:nth-child(1) > div > div:nth-child(1) > div > div.slider-decorator-0 > div > div > ul > li:nth-child(2) > div

With the CSS selector, we can create the steps to take a screenshot of the first carousel element. We click on the first dot, then take a screenshot:

{"command":"click", "element":"body > div.js-content > div > div > div.js-body-content.page-content-wrapper > div > div > section:nth-child(1) > div:nth-child(1) > div > div:nth-child(1) > div > div.slider-decorator-0 > div > div > ul > li:nth-child(2) > div"},
{"command":"screenshot"}

We repeat the same process for the next four dots to get the full list:

{"command":"click", "element":"body > div.js-content > div > div > div.js-body-content.page-content-wrapper > div > div > section:nth-child(1) > div:nth-child(1) > div > div:nth-child(1) > div > div.slider-decorator-0 > div > div > ul > li:nth-child(2) > div"},
{"command":"screenshot"},
{"command":"click", "element":"body > div.js-content > div > div > div.js-body-content.page-content-wrapper > div > div > section:nth-child(1) > div:nth-child(1) > div > div:nth-child(1) > div > div.slider-decorator-0 > div > div > ul > li:nth-child(3) > div"},
{"command":"screenshot"},
{"command":"click", "element":"body > div.js-content > div > div > div.js-body-content.page-content-wrapper > div > div > section:nth-child(1) > div:nth-child(1) > div > div:nth-child(1) > div > div.slider-decorator-0 > div > div > ul > li:nth-child(4) > div"},
{"command":"screenshot"},
{"command":"click", "element":"body > div.js-content > div > div > div.js-body-content.page-content-wrapper > div > div > section:nth-child(1) > div:nth-child(1) > div > div:nth-child(1) > div > div.slider-decorator-0 > div > div > ul > li:nth-child(5) > div"},
{"command":"screenshot"},
{"command":"click", "element":"body > div.js-content > div > div > div.js-body-content.page-content-wrapper > div > div > section:nth-child(1) > div:nth-child(1) > div > div:nth-child(1) > div > div.slider-decorator-0 > div > div > ul > li:nth-child(6)"},
{"command":"screenshot"}

With one call to Browshot, and these 10 steps, you will get five screenshots showing the 5 positions of the carousel. If you want to capture just the carousel content, and not the entire page or screen, you can specify to take a screenshot of just the carousel:

{"command":"screenshot", "element":"body > div.js-content > div > div > div.js-body-content.page-content-wrapper > div > div > section:nth-child(1) > div:nth-child(1)"}

Creating this kind of automation can be difficult at first. We are here to help. Don't hesitate to contact us if you need assistance.

See more...

Login to a website to take a screenshot

Apr 6, 2020

Tags: api automation

Login to a website before taking a screenshot With the introduction of automation steps, it is easier to log in to any website before taking a screenshot. In this post, we'll show you how to log in to a website, Browshot, and take a screenshot after authentication.

To log in from the home page of https://browshot.com/, a user must click on Login. This displays a login form where the user has to enter his username and password. Then the user clicks on "Login" to obtain access to his dashboard.

Login to Browshot

Find the element to interact with

We're going to build the different steps to log in; then we'll navigate to a different page in the dashboard and take a screenshot. The hardest part of the process is to get the identifier (called CSS selector) for each element we want to interact with: the button to click on, the input box in which to enter our username, etc. In order to find this identifier, we need to use the Developer Tools from your web browser. Press F12 to open the Developer Tools. Navigate to https://browshot.com/. In the Developer Tools, click on the mouse cursor in the top left corner (highlighted in red below).

Developer Tools

Then, move your mouse over the Login button at https://browshot.com/. The HTML code corresponding to the button is now highlighted in the Developers Tools. Right-click on it and choose Copy > Copy selector:

CSS selector CSS selector

If you paste the value in a text editor, you get:

#login-btn

This is the CSS selector that identifies the Login button. We're ready to take the first step to click on the Login button:

{"command":"click", "element":"#login-btn"}

The next steps are to enter the username and the password in the login form. In your browser, manually click on the Login button to show the form. In the same way, use the Developer Tools to copy the CSS selector for the username and password input fields:

#login-form > input[type=text]:nth-child(1)
#login-form > input[type=password]:nth-child(2)

We use the "type" command to type the username and passwords in their respective input fields:

{"command":"type", "element":"#login-form > input[type=text]:nth-child(1)", "value":"username@email.com"},
{"command":"type", "element":"#login-form > input[type=password]:nth-child(2)", "value":"PASSWORD"},

Then, we click on the Login button at the bottom of the form:

{"command":"click", "element":"#login"}

This last step authenticates the user and loads https://browshot.com/dashboard. We can take a screenshot of the dashboard, or any other page. After login in, we wait a couple of seconds for the login to work, then navigate to https://browshot.com/dashboard/settings:

{"command":"sleep", "value":"5"},
{"command":"navigate", "value":"https://browshot.com/dashboard/settings"}

Finally, we wait a few seconds to allow the page to load. Then we take a screenshot of it:

{"command":"sleep", "value":"5"},
{"command":"screenshot"}

The complete list of steps is:

[
  {"command":"click", "element":"#login-btn"},
  {"command":"type", "element":"#login-form > input[type=text]:nth-child(1)", "value":"username@email.com"},
  {"command":"type", "element":"#login-form > input[type=password]:nth-child(2)", "value":"PASSWORD},
  {"command":"click", "element":"#login"},
  {"command":"sleep", "value":"5"},
  {"command":"navigate", "value":"https://browshot.com/dashboard/settings"},
  {"command":"sleep", "value":"5"},
  {"command":"screenshot"}
]

You can add more steps to navigate to multiple pages and take multiple screenshots, click on elements in the pages, etc. We will post more examples on this blog.

Creating this kind of automation can be difficult at first. We are here to help. Don't hesitate to contact us if you need assistance.

See more...

Rich browser interactions with automation steps

Apr 5, 2020

Tags: api automation

Rich interactions with web pages With Browshot, you can inject JavaScript into any page to log in, click on elements, etc. To expand the range of possible interactions and simplify them, we have added automation steps. These steps are available with the latest API.

On this blog, we will post several examples using automation steps, including:

type

Automation steps

The automation steps describe the list of commands that the browser must execute. Unlike the injected JavaScript, these steps can be carried out over multiple pages and generate multiple screenshots. Each step contains:

  • a command:
    • type: type text, like a username or password
    • click: click on an element
    • javascript: execute and JavaScript
    • sleep: wait for a number of seconds
    • navigate: navigate to a new URL
    • screenshot: take a screenshot of the current screen, page, or specific element
    • for: beginning of for loop
    • end: end of for loop
  • element (optional): a CSS selector targeted by the command, for example, the input field to type a username, the element to click on, etc.
  • value (optional): the number of seconds to sleep, the text to type, the URL to navigate to, or the JavaScript code to execute

The examples are described in JSON format, in a JSON array (even if there is a single step). Here are some examples of steps:

[
  {"command": "click", "element": "#login"},
  {"command": "type", "element": "#username", "value":"username@mail.com"},
  {"command": "type", "element": "#password", "value":"PASSWORD"},
  {"command": "click", "element": "#submit"},
  {"command": "sleep", "value": "2"},
  {"command": "navigate", "value": "https://mysite.com/dashboard"},
  {"command": "sleep", "value": "5"},
  {"command": "screenshot"},
]

For loop

You can iterate over multiple elements by using the for ... end loop. For example, click on elements and take a screenshot of them:

[
    {"command": "for", "element": "<N>", "value": "1..100"},
    {"command": "click", "element": "#foo > li:nth-child(<N>)"},
    {"command": "screenshot"},
    {"command": "end"}
  ]

The for loop defines the variable <N> with the values 1 to 100. In each loop, the browser clicks on the Nth li element and takes a screenshot.

This loop will stop after N = 100, or when the element to click on is not found. For example, if they are 5 elements, the loop will stop when N = 6.

You can define any name for the variable. <N> is used by default. The default value is 1..100.

API call

Use the API call argument steps=[...] to the screenshot/create API call. The steps must be encoded as a URL, like any other argument. The encoding is done automatically if you use any of the libraries we provide. Remember that even if you have only one step, it must be included in a JSON array. You can also try the automation steps in your dashboard.

Note: The automation must be completed within the delay specified by the API. You should set the delay to 30 seconds (delay=30), which is the maximum delay authorized today. You will get an extra 30 seconds per screenshot, up to 5 minutes in total. For example, if you take one screenshot, all your automation steps must be completed within 30 seconds of the initial page load. If you take three screenshots, all the steps must be completed within 90 seconds.

Cost

The first screenshot costs one credit for desktop browsers and two credits for mobile devices. Additional screenshots cost one credit.

Deprecating multiple shots

Automation steps are a better way to take multiple screenshots. The shots and shot_interval options are deprecated and will be removed soon.

Don't hesitate to contact us if you need help with the automation steps.

See more...

Blog home page

    Blog archive - Subscribe

    Try it for free

    no credit card required

    About Us

    Browshot is a web service to create real time web screenshots in a multitude of virtual devices, including mobile devices like the iPhone 3 & 4, iPad, Android Nexus, etc.

    You can use the web dashboard, or our full-featured API.

    • Real time screenshots

    • 15+ mobile devices: iPhone, iPad, Android, etc.

    • 30+ desktop resolutions

    • Fast and reliable

    • Thumbnails of any size, any ratio

    • Full API, open-source libraries